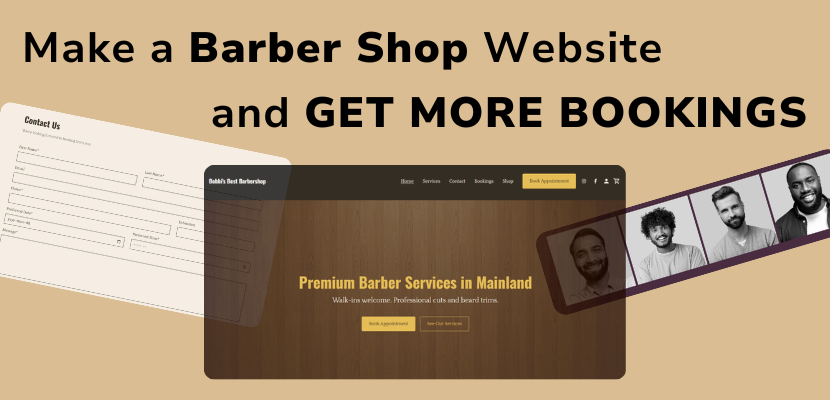
You can make your own website for your barber shop to get more clients, and make it easy for new and existing customers to find you, see your work, and book appointments! Watch our full, step by step video to see how anyone can make a barber shop website with no experience using the Website.com site builder.
Overview:
00:00 Intro
0:17 Create account and choose a template
1:05 Edit homepage
2:15 Change welcome image
2:50 Change section layout
3:15 Change colours and fonts
5:00 Add services section
8:55 Add booking methods
9:06 Add form and address
10:58 Add online booking
12:54 Update header and footer
14:23 Preview desktop and mobile website versions
14:50 Publish barber shop website to live
Transcript below:
In this video, I’ll show you how to create a professional barber shop website step by step using website.com. By the end, you’ll have a homepage, services section, booking button, and contact page ready for customers. So, let’s get started. I’m logged into my Website.com sitebuilder account. I’ve already signed up for a domain name, and I have my account, and I’m going to access the website builder. Now, before I start adding my own content, I’ll click on template library. And next, we’re going to browse the templates to look for something for a barber shop style. You can click through these to look through different categories.
So, I’m looking for a dark or bold design, a large hero image area, and clear call to action buttons. This looks interesting, so I’m going to select this template. And now I’ll reset my entire site to this template.
Now that I’ve reset the template to this design, let’s edit the homepage. So we’ll click on the main header section that’s right here. And let’s go ahead and replace the text with something like “Premium barber services in (your city).”
So if you want to type to edit on the website builder, you can click right on the text or you can find that field on the left and edit here. So for example, if we want to edit the subtitle, I’ll click on the left here and let’s add a short value statement like Watkins welcome professional cuts and beard trims.
Now, let’s change the background image. So, you could upload your own high quality image of your barber shop interior, a barber cutting hair, your grooming tools, and if you want to upload from your computer. So, we’ll click on this section. We’ll see where it says media, you can click upload and change right here, or you can click select from files. So to upload your own image, you can click upload file right here. For the purposes of this video, I’m going to use a stock image. And the stock images are copyright free and included with my plan. So I’ll look here and click stock images.
Maybe I’ll choose something like this. and then I’ll click save. Now, if you want to change the layout of this header section, also called the welcome section. When we’ve clicked on it, we can click here to change colors and layout. And we can click change design. For example, I might want it centered and with a dark overlay.
So, I’m happy with that. I’ll click apply design. You might also want to change the colors and the fonts for the website. To do that, we’ll click back. We’ll click on this start button. And we’re going to click site design. So, first I’ll play around with the site fonts. You’ll see that there are all these different designer made layouts. These are designer made font pairings.
So I might want to choose something like this. And now let’s click again on the welcome section. I want to make this title a bit bigger. So on the left you can control that I found the title field.
I’ll make that larger. Now let’s play around with the colors. So again we’ll click to go back to start. We’ll click on site design. And now we’ll click site colors. And these are some color presets that you can choose from.
This one looks interesting, so I’ll keep that. And let’s go back to start. Now, here are the buttons. If you want to edit the labels on them, just click on them. And on the left, you can see where it says label. It says book appointment. And currently, it goes to the Contact page. Here is see our services
and it goes to the Services page. And these pages came with the template. After we’ve edited more on the website, we might want to change the destination of these buttons. So, we’ll get to that later. So, let’s scroll down and I want to create or edit a services section. So here, if you want to delete a section that came with the template, all you have to do is click on it and then click this delete section button. And now it’s gone. This is beautiful. This is a gallery. And you might want to keep that to show off some of your services that you’ve provided or some past clients. All you have to do is change out the text and update the images like I showed you in the welcome section.
But let’s add a services section to this homepage. So, we’ll click add section and there is a services layout page. So, we’ll click that one and then you can choose your design. Choose this layout. And now here is a services section that I’ve added to the homepage. So, I’m going to update these. You might want to add a subtitle.
I’ll toggle off the description. And now I’ll start adding the services.
I’ll keep the descriptions short and clear.
Now, for the button, we’ll need to choose the destination for it. I haven’t edited the services page yet that came with this template, but it does exist. So, I’m going to link this button to that page. I’ll click right here under button. I’ll click on page. And now for the site page, we’ll have it go to services. So, if I edit this services page, I might want to have different sections on the page that say haircut. If that was the case for the section in page, I would link it to that section. Right now, I don’t have that, so I’ll keep this as top of page. And then I’ll click save. You also might want to customize the services section with your own images, but for this video, I’ll keep it with template.
And I’ll link this to the services page.
If you want to add another service to this section, right now there are three that came with this layout. All you have to do is click on the section but away from each specific item. So when you’ve done that, you’ll see on the left it says services. You can click add service right here. And now I’ve added one.
So, we’ve edited that services section. Now, it’s time to add a way to let users book an appointment with you. And you can do this by adding a contact form and contact information or adding online booking to your website so visitors can easily book instantly through your site. So, for option one, we’ll try that.
Underneath this gallery that we’ll need to update, you can click add section. First, we’re going to add an address and map section. This is going to let users know where they can find you. So, just click to edit all of this information or you can customize the map. And now we’ll add a contact form.
We’re going to customize it to collect the name, the phone number, and preferred date and time. So, I’ll just click right on the form. You can see where it says add form field. First I’ll click phone. I’ve added that field. And if I want this higher up on the form, I’ll click there. Right now it’s a required field. If you want to make something not required, all you have to do is click on that field. And on the left, you’ll see that it says required. You can toggle that off. We’re also going to add a preferred date and time field. So I’ll click here. We’ll add date and time.
First of all, I’m going to change that label so it says preferred.
There we go.
And I’ll bring that up. So, here is the form. Right now, if you want to see any of your form submissions, you can see them all within the website builder, either just by clicking on this form on this page and looking to the left where it says manage form submissions, or if you click right from the start, you’ll see that there’s a web form section. You can click on that and see all of the submissions for each of your web forms. Now for option two, you can add online bookings so that visitors can automatically book an appointment through your website. To do that, we’re on start here. All you have to do is click bookings. So click that and then add online booking. Once it’s been added, you can create different services, assign staff members, and set your bookable business hours. I have a video series showing you exactly how to set up and customize online booking for your business. And I’ll drop that video link in the description. So, once you have a way for visitors to book an appointment with you, make sure you customize those buttons on your website.
So, for example, here where it says book appointment, I might want to change that so that it goes to the homepage still and leads you to the contact us section. And then I’ll click save. And for see our services, I’ll also update that link. I’ll have that go to the services section on the homepage.
So you’ll see that this template did come with different pages. If we go to home, we can click on manage pages. You’ll see it has a homepage, about page, services, contact page, and the bookings page that we just added. If you want to delete any of these pages, all you have to do is click on the edit pencil here and then click delete page. If you’d like to edit the content on the page, just click here to go to it. And now you can edit all of this content like how I showed you for the homepage. And you’ll want to do the same for the contact page as well.
Now, let’s look at the homepage. Something that’s important to do is to update the header and the footer on the website. That’s the very top and the very bottom section on the website.
So, first we’ll click here. I don’t have a logo yet, but if you have a company logo, you’ll want to upload that and update it. I’ll toggle off the logo.
I’ll customize the company name. You can customize where the link goes. So, this one right here. And something important to look at is to customize the social media links. So, we’ll click right here. Make sure you input the correct URLs for your social media accounts and profiles.
You can add more if you’d like right here.
And if you want to remove any of the social media icons, just click remove beside it right here. When you’re happy with that, click save and publish changes. And one thing to note is that the social media links in the header are synced with the ones in the footer. So you only need to do that once.
Now, let’s go ahead and preview the website so far. So we can click preview right here. And what’s great about the website.com site builder is that your design is automatically optimized for mobile viewing. Most barber shop customers will visit from their phones. So you can just click right here on these icons to see what your mobile site versions will look like.
Now it’s time to make your website go live. So just click publish in the top right corner. and we can go and visit the site. Be sure to visit your live site and test out the navigation menu, the booking buttons, and the contact form.
Your barber shop website is now live and ready to bring in customers. We hope this video was helpful and don’t forget to subscribe to.com and thanks for watching.