If you are looking for the best website builder for your construction or contractor website, Website.com is the best one for the job. Website.com offers a code-free way to make your website, with all of the industry-specific features you need. Start with a construction template and then fill in the sections with your own content for your business – no learning curve required! Watch this video to find out how to make an entire construction website using the website builder:
Video script:
Hi there, contractors and builders! If you’re ready to get your construction business online and start getting more clients, in this video, I’ll show you how to build a professional-looking website in just a few easy steps, no coding needed, using the best website builder for your needs.
First things first: pick a website builder. You want a builder with the best bang for your buck, that is easy to use and has the features you need so you can focus on your business.
Website.com is the best website builder to help you get your website off the ground, with little to no learning curve, templates that are easy to customize, and the right features for your construction company website.
After you’ve signed up for a site builder plan, we’ve logged into the site builder, and the next step before you start customizing is choosing a template that matches your brand.
We’ll go to the template library.
We want to look for templates designed for contractors, home remodelers, or construction services, which have built-in sections for services, projects, and contact forms. But with any of the templates, they are fully customizable, so you can always add or edit pages with the features you need.
Now let’s make it your own. You’ll want to make sure you have these key pages: a home page, services page, portfolio or projects page, and an about page.
The template happens to come with all of these pages, but if you want to edit or add any pages, just Manage Pages here.
But we’ll go ahead and customize the pages to make my website competitive online.
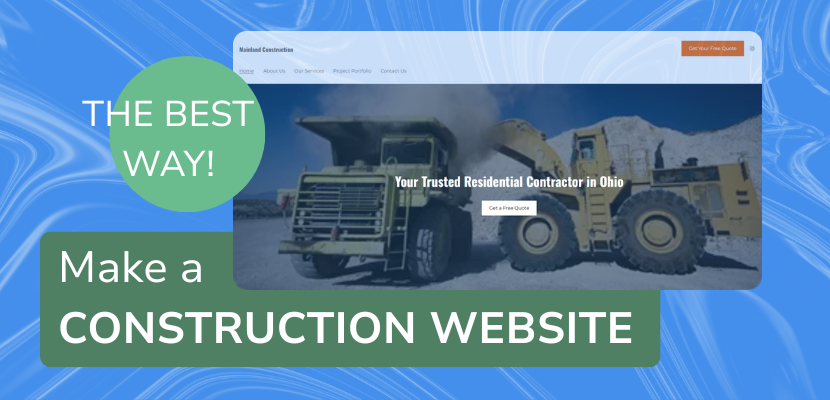
So we’re currently on the home page, and we want to make sure in this welcome section, there is a clear headline like “Trusted Residential Contractor in ___” and then enter your city here.
This is a great tip if you have a targeted keyword like “residential contractor in Ohio”, it’s best to have that in the title here, and also to have it in your page or website SEO title. I’ll show you how to edit that at the end of the video.
We also want to make sure the call to action is very clear, for example let’s choose “Get a Free Quote.” So we’ll click on the button and edit right on it, or you can look and edit on the left.
Now we want to change the button link, and we’ll want that to go to the contact page, so on the left, just click under where it says primary button, and then choose a page > contact us.
Now we’ll toggle the secondary button off so I keep the action very simple.
You can also edit the image, for example you can use an image of your best project.
Just click on the image, and you can click select from files from the left side panel. Now you can upload your own photos to use on your website here, or feel free to browse stock photos for now that are included for free in your account.
Feel free to edit the rest of the home page, and if you want to add a new section with more features, just click add section, and you’ll see the different section types that have features for different uses.
Let’s navigate to the services page, and let’s use the page drop down up here.
Now you can list all the services you offer: remodeling, roofing, additions, etc.
Use icons or images to break it up visually.
For example, this section layout design uses icons, and you can explore the icons that come with your plan by clicking on an icon, and then you’ll see on the left, you can click select from files under media.
Now you can look through all the icons here, and click Save to change it.
This services section has blocks with icons and text, if you want to add more services to it, click on the services section but make sure you haven’t clicked into an individual block.
Now you can see all the services that are listed, just go ahead and click add service, or you can click on the pencil icon beside a service to delete or edit it.
Now let’s go to the About Us page.
The goal for this page is to build trust with potential clients.
Share your company story, years in business, licenses, and what sets you apart.
If you want to delete a section on a page, just click on the section, and click on the trash icon on the mini toolbar to delete the whole section.
Now let’s take a look at the Portfolio or Projects Page.
You can show off before-and-after photos and add short descriptions of the job: location, type of project, what you did.
For the last page, let’s edit the Contact Page.
Include a phone number, email, contact form, and a Google Map to make it easy to find you.
Now before we publish all these changes, let’s look at the header and footer for your website.
These areas are global, so that means the changes you make on them will appear on the header and footer for all of your website pages.
If you have a logo, it would be great to include it here by making sure the logo is toggled on, and then upload it to the file manager and add it.
If you don’t have one yet, no worries, we can just toggle that off. And make sure your business name is accurate.
For the call to action, again make sure it’s the main call to action that you want people to take when they visit your website.
We’ll keep that as “Get Your Free Quote” and link it to the contact page.
For the social media icons, it’s great to link your social media accounts here so that site visitors can learn more about you and build more trust with you this way.
It also gives you a chance to stay on the top of their mind if they follow your business on one of your social media accounts.
Let’s click on that, and then under Social Media Links, click Edit.
Now you can choose to delete the icons you don’t want to appear in the header or footer, and add in the URLs for the accounts you have. If you want you can also add the social media icons here as well.
Let’s scroll down to the footer for the website. You’ll notice that the social media links are the same for the header and footer, so you only need to edit that once.
You can edit the business name and logo again. And make sure your contact information is correct here.
Now as promised, I’ll show you how to optimize the page and website titles for SEO.
To optimize the page titles, we’ll click on the home button to go back to start, and then choose Manage Pages.
Beside the pages, you can click on the pencil icon, and choose Page SEO.
So you can now write your page title and page description to include the targeted keywords that you want your website to be found for, such as “Trusted Residential Contractor in Ohio.”
This lets people and search engines know what your website is about, and it may show up in search engine results for your website, or in the tab for this web page.
To add an SEO title for your website, again we’ll go back to start, and then chose Marketing & SEO, and then choose Site SEO.
You can now add a title and description for your entire website.
Once everything looks good, it’s time to hit Publish!
Now that your website is live, you can share your website everywhere: Add it to your Google Business Profile, post it on Facebook and Instagram in your bio, and put it on your business cards and trucks.
That’s it! You just built a construction company website that works as hard as you do! If you found this helpful, give it a thumbs up, subscribe, and make your website from Website.com – find the link in the description. Thanks for watching!