A home inspection website should have one main goal: to get clients to hire you. Here are the elements of a home inspection website that you can make yourself using the Website.com site builder.
Professional Domain Name
Start with a professional domain name that reflects your business. You want it to be memorable, and preferably without dashes or keywords. By having a professional domain name, you instantly communicate that your business is legitimate.
Home Page
Key information you’ll want to convey is your location and service areas, the services you offer, who you are and why clients should choose you. Make sure your contact information is easily accessible so clients can book you right away.
Specialized Service Pages
For each of the services you offer, create a page that details what the service includes, and how your services stand out from competitors.
Accreditations or Affiliations Badges or Logos
On your home page, on your service pages, and on your About page, having an accreditations section that displays badges to verify your qualifications can help make you look more trustworthy and credible.
Testimonials
Social proof goes a long way to build client trust. Be sure to collect reviews from satisfied clients, and proudly display them on your home page, on each service page, and your about page.
Contact
The main goal of your website is to get people to hire you, so make sure they know exactly how to do that! Whether you want to add online booking to your website, display your email or phone number, or include a contact form on your website – make sure your contact information is easily found on your main pages, and create a dedicated Contact page with your key contact information.
Sample Inspection Report
Include a sample inspection report so that future clients can see you at work! A sample report gives potential clients an idea of what you offer and the methods you use, and they can easily see if you’ll deliver what they need.
These are the key elements needed to make your home inspection website, and you can easily use the Website.com site builder to make your website from beginning to end.
Here is a full walkthrough video of how to build a website for your home inspection business, from start to finish! Find the transcript below the video.
Hi everyone! In this video I’m going to do a full walkthrough for how to make your own home inspection website.
As a home inspector, you’ll want a fast and efficient way to make a website with the main goal: to get clients to contact and hire you.
These are all the essential elements for what you need to include on your home inspection website so you establish yourself as the home inspector that buyers, sellers, and real estate agents trust.
It doesn’t require any technical skills or prior web design knowledge – you can make this entire website using the Website.com site builder, starting with a template, and adding your own content.
So let’s go.
First, we’ve signed up for a website builder account on Website.com.
You signed up for a domain name with that represents your business, and it’s easy to remember and professional, preferably without any numbers or dashes.
We’ve logged in and gone straight to the the website builder.
Now before you start adding your content, let’s choose a new template.
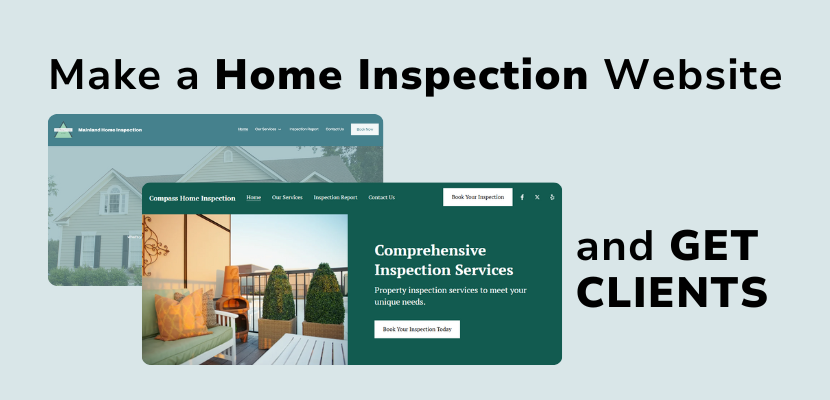
We’ll click on template library, and I’ll look under Business and scroll. I’ll choose this home inspection template (compass, green)
Now we’re ready to start customizing our website.
On the home page, some key information you’ll want to convey is your location and service areas, the services you offer, and who you are and why clients should choose you.
So first, let’s include the service area right on the hero section. We’ll add that right to the title.
Now you can go ahead and change the image in the hero, just by clicking on it, and clicking select from files, and you can upload your own image or just choose from the stock photos that are included with your plan.
Now let’s scroll, and here you can go into a bit more detail about what you offer and why clients should hire you over others.
You can list the services you offer, and your working style that makes you stand out.
For the buttons, you could link one to your services page, and then link the other button to a contact page.
Now you can include a section for adding your verification seal, or logos of third party certifications or qualifications.
This template already came with this section, but if you chose another template and want to add this logo section, just click add section above or below another section, and you won’t find a logo section, but an easy hack is to add a client section, and now choose the layout that includes all the images like this.
So just as an example, let’s add this one, and now you can add the logos and verification seals.
I’ll just edit the text here.
And I’ll delete the section that came with the template.
Now you can go a little more in depth for the specific services you offer.
I’ll just edit right on the services section that came with the template, or you can add a new services section with a different layout the same way I added the section with the logos.
Now for the button, you could include a specialized page for each service.
This establishes you as an expert and gives clients peace of mind or addresses questions they have.
To create a new page, we’ll click on the home button here, and then click Manage Pages.
Now you can click to add new page.
We’ll add an About Page because I like the way that content is laid out, although of course you can customize that by adding or removing sections, and then I’ll give the page a name: Home Inspections.
I’ll also add a page: Condo Inspections
Commercial Inspections
And Mold Inspections
Now that I’ve added all these pages, I want to edit how they appear in the website menu, and I’ll make them a subpage under Services.
So in the pages and site menu area, you can hover to the left of a page title, and then click and drag it below and to the right of another page.
Another way that you can do this is to click on the pencil icon beside the page, and then choose to move it up or down, and when it’s below the menu item you want, choose Set as Subitem.
Now I’ll continue to edit my Home page.
You can edit all of the images and text on here just by clicking and then editing on the left, or right on the builder itself.
And now that the pages are created, you can link each page to its corresponding page. We’ll make the button text more specific.
Now another compelling section you’ll want to add to get more clients is social proof and testimonials. We’ll hover on this section and then click add section > Testimonials.
Now you can choose to add the layout you prefer, either with a single testimonial or multiple testimonials.
And then go ahead and edit the text or images for this section.
If you add the multiple testimonial layout, you can remove or add testimonials to the section, either add by clicking add testimonial, or remove one by clicking the edit pencil on the testimonial you want to remove, and then click Delete.
Now in for your footer section, this section on the bottom is global, which means it will be the same across your website for every page on your website.
It’s important that you include as much contact information here as possible, especially an email and phone number so that prospective clients can easily reach you.
Something to note is that if you are connected to a real estate agent that likes to refer you, they might google your website to quickly find your contact information to share with their clients. So make sure your contact information is easy to find throughout your website.
Now we can move on to other pages.
Some other pages we might want to add are an About page, or you can even call it, and here you can introduce yourself, state your business ethos or what sets you out above the rest.
You might want to think about including a headshot of yourself for familiarity and building credibility.
So we’ll add a page, give it a title, we’ll choose the About Page layout.
You might also want to add all of your certifications and verification seals, like we did for the home page.
Lastly, you can include your contact information to make sure clients can easily hire you.
Now let’s move on to another page.
This template already came with a Services Page, which I want to keep, I like most of the format of it so far, which lists out all the different services I offer.
I’ll just change the links for the buttons to go to the pages I created for each service, and change the button text.
I might add one more section to the bottom, which is a contact section. Again I want to give visitors the easiest time possible hiring me.
Let’s take a look at one of the brand new pages that I created, and we’ll definitely need to edit the content on these pages.
So for the Condo Inspections page, you can change the image here, and then put in your own text.
For the button, I’ll have that go to my contact page and change the button text.
Now I’ll also toggle on another button, and this one will say See Sample Condo Report
Now we can go ahead and click Link To, and I’ll have it link to a file.
Now you can simply click this button to upload a file from your computer, or if you’ve already uploaded a file to the file manager, you can select that, and the most popular file format for this would be to include a sample report in PDF format.
So click Save.
And now you can choose the action that occurs when users click on that button, you can choose for visitors to download the file, open the file in the same window, or open it in a new tab.
I’m going to choose Open in New Tab, so now visitors can click to see the Sample Inspection Report, and it will open in a new window or tab, depending on their browser.
Now let’s add another section, and this time we’ll add a list section.
You can edit all these with the different cases that this service will cover, or you can use it to highlight the features that this service includes.
Under that, we’ll add an affiliations and accreditations section again.
We’ll add a testimonials section.
We’ll add an FAQ section, and this is great for many reasons.
First, you can answer all of the major questions to remove any barriers in a potential client’s mind, you can establish yourself as an expert, and you can also naturally include more relevant content and keywords on your website so that your website can be found easier on search engines.
Lastly, be sure to add a a contact form, or your contact information, so that visitors can easily book you.
Now you can go ahead on repeat this process for the other service specific pages you’ve created, but I’ll move ahead and take a look at the Contact page that came with this template.
So I like how this contact page has a welcome section on the top, a contact form so that visitors can reach me, and an address and map section at the bottom, which is so important for a couple of reasons.
First, the map clearly conveys the location that you service, and second, your phone number is clearly displayed.
Many real estate agents may actually be using your website to grab your contact information to refer you, even if they’re a repeat referrer, so it’s great to make sure that info is easily accessible.
Now on the top, I’ll make sure that I also include more information about how to contact you, so that I don’t waste this important space above the fold.
So you can go ahead and slowly customize the content your site, but one thing I want to point out is that this template currently includes Booking, so it allows booking through your website.
I’ll drop a video link in the description to show you how to edit your settings for online booking.
However, if you prefer to just have clients hire you by calling, email, or contact form, make sure you remove the booking page and edit all the button links so that they lead to your contact page, or an appropriate page.
So we’ll do that for the header.
Let’s scroll to the very top.
And note that all the changes you make to the header and the footer on your website apply to the header and footer on all your website pages.
You’ll notice you can add a logo if you’d like, and I’ll edit the link to lead to my contact page. For the social media icons,you can click to edit that links so that they lead to your social media profiles.
Now you can also edit the information on the footer.
So once all of this has been edited, you can go ahead and public your website so that it goes live.
Just click Publish in the top right corner.
So that’s it! You can easily make a website for your home inspection business using the Website.com site builder.
If you have any questions, feel free to reach out to our support team for help. And don’t forget to subscribe to @websitedotcom for more website tips and tutorials. Thanks for watching!