Online booking is a powerful tool that can be the deciding factor for whether a client chooses your business over another. You can easily add online booking capabilities to your website, perfect for your business if you offer classes, services, consultations, and more!
In this first Online Booking video tutorial, you’ll find out how to:
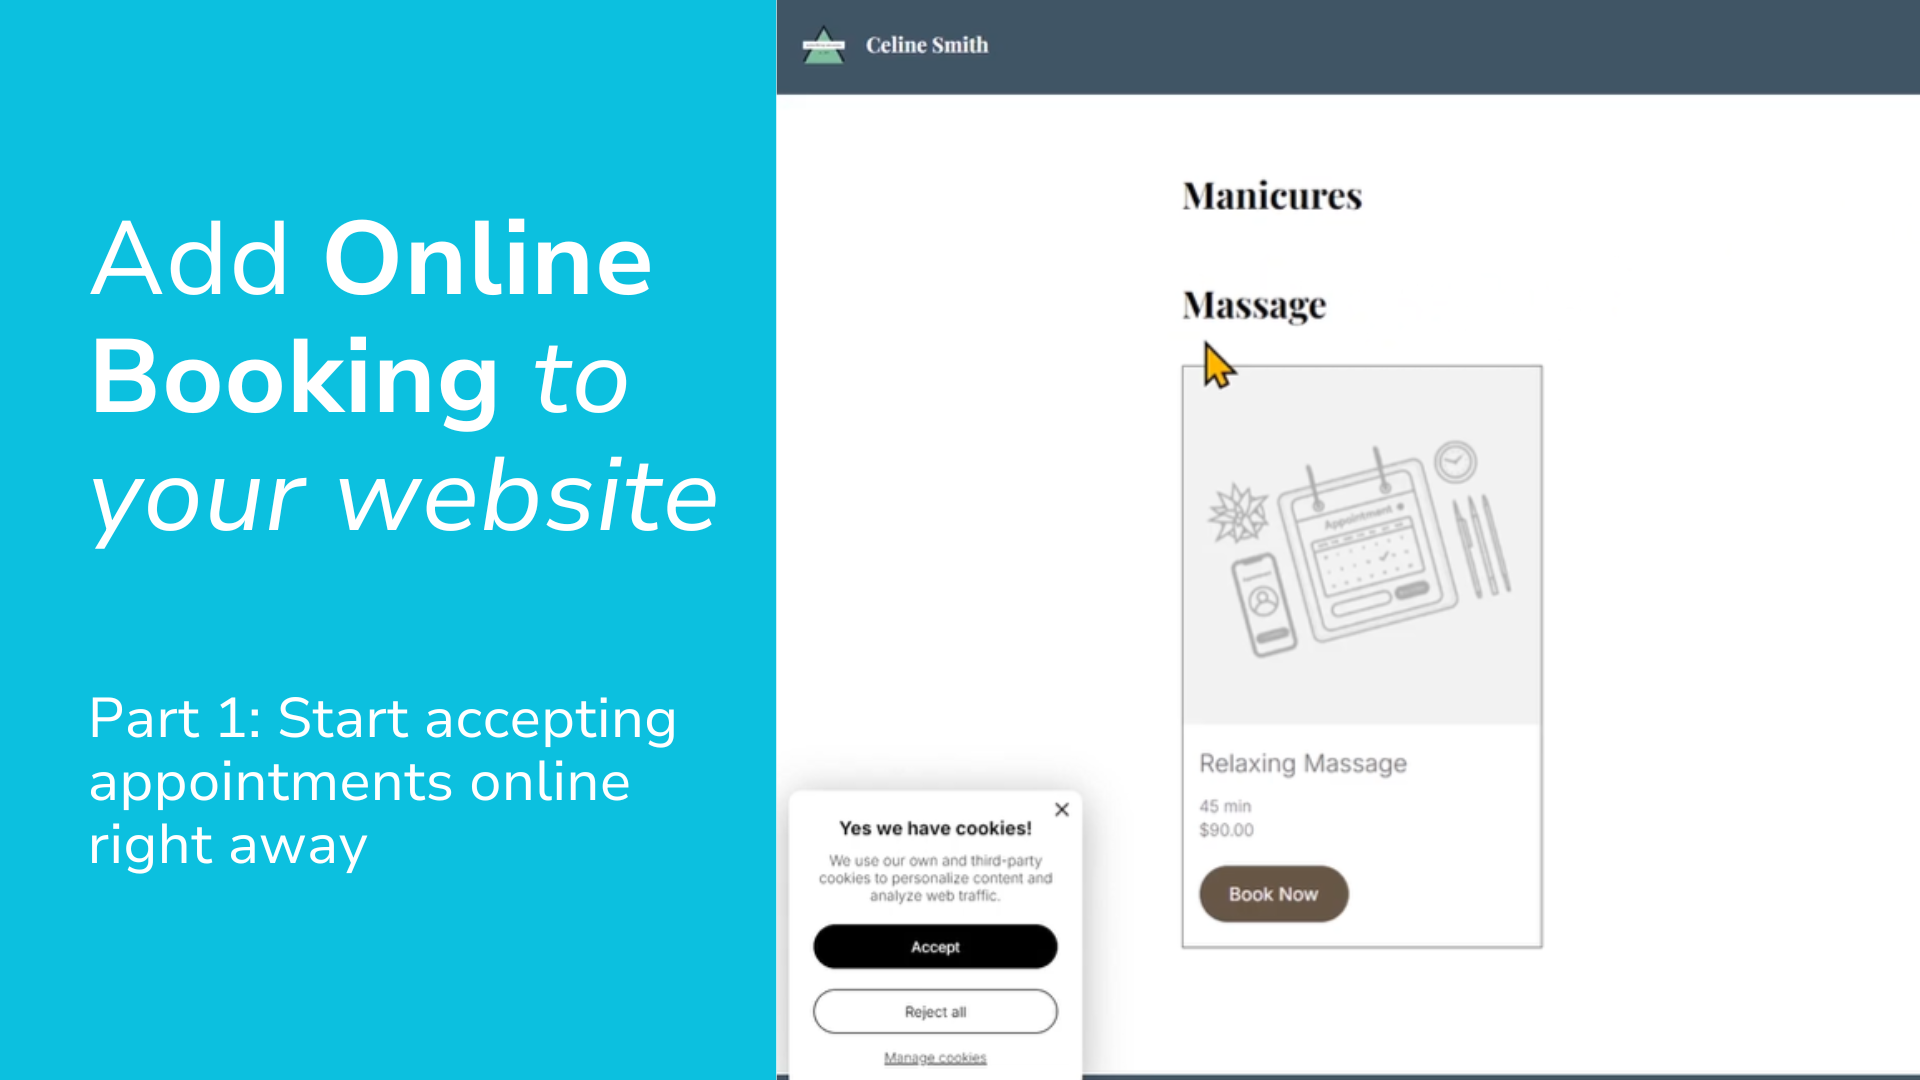
- Add online booking to your website
- Set up a service to be booked
- Add service categories
- Add staff
Follow along with the video to find out how to add online booking to your website. Find the video transcript below the video.
Find the link after the transcript for Online Booking Part 2, and learn how to set up your business info, appointment notifications and booking policies.
TRANSCRIPT BELOW:
Hi everyone! In this 2 part video series, I’ll show you how easily you can add online booking to your website, so you can allow visitors to book services directly on your website.
In this first video I’ll show you how to add Online Booking to your website, and how to set up a bookable service, service categories, and staff on your website.
In the second video, I’ll show you how to set up your business info and hours, appointment notifications and reminders, and booking and cancellation policies.
To start off, I’m logged into the site builder, and on the left, I’ll click Bookings.
Now I’ll add Online Booking.
Now I’ll open the Bookings Manager.
So you’ll see a checklist of what you need to set up to get online booking ready for your website.
We’ll start by adding a service.
You can click here for a quick way to access it, or on the left.
Click Booking Services.
You’ll see the sample services that have been added just to show you what it looks like.
I’ll start by selecting them all and then clicking Delete on the top right.
Now we can add a new service by clicking this button.
We’ll name the service, for example if I want to offer Yoga Classes, I’ll call this Yin Yoga.
We’ll need to add it to a category, I’ll add a new Category now.
I’ll click Add New Category.
Add Yoga.
Now I’ll click Next.
So you can fill in the information for the Yin Yoga class, I’ll leave the tagline blank but I’ll add a description.
Now you can choose whether you want to make your service visible on your website yet, if you want to set it up but don’t want to have it shown on your site yet, you can uncheck it, but I’ll keep it visible.
So here is the category that I selected when I created the service, you can click the dropdown to see more categories or add more, later in this video I’ll show you how to manage your categories.
Now I’ll scroll to Service Settings. Here is where you can set the duration of the session.
I’ll set that to 50 minutes.
And I’ll add a buffer time, which is a break after the session, which means a customer cannot book a session right after your other session ends.
I’ll add a buffer time of 10 minutes.
Now for participants, you can set the maximum number of people that can book for a single session.
I’ll set it to 5.
Now we can set the price.
Fixed price is a set price per session.
You can also choose to make a session free, for example if you want to use this online booking system to allow people to book a consultation or a trial session.
You can also add a custom description which will allow you to add the type of pricing you’d like, or explain a different pricing structure.
Now it’s time to choose a location for the service.
If you choose Business Location, then it will be held at the address that you set as your business location. I’ll show you later where you can customize this.
You can also set a client’s location.
Or add a custom location, where you can add a description for where the service will take place.
For example, if the session will be held online, you can simply add instructions for where to find the link to join the session online.
Or if a session is held at a different address depending on the staff that is running the session, you can add the address here.
If you want to add a link to webinar or a meeting link, you can add that here, and it will appear on the booking confirmation page and confirmation emails.
Now you can set the staff that is running the session.
You can choose an existing staff member, or add more staff members here.
Now you can set the availability of the service.
Select the staff that is providing the service, and set the hours that are available to book with that staff member.
For example, if this staff member is selected, under hours, you can choose default, which will be the hours that are set for the business hours.
You can also choose custom, and this options means that the availability of the session will depend on their available hours for the staff member for this session.
So for example, we can choose which dates and times are available for this service to be provided by this staff member.
You can set different hours for different staff members for each service.
So now that all of this is done, you have added a service to your website.
Now I’m going to go back to the Booking Manager.
Really quickly, you can use these quick links to add and manage staff members, or you can use this link on the left.
You can also view your service categories with the quick link here or on the left. I’ll just go to that, and delete the Sample Services.
So I’ll publish my website to make everything go live.
Now let’s go to the published side.
So this is what visitors will see when they go to your website.
They can go to the bookings page.
And this is the service you added.
And now they can click Book Now.
They’ll see the available dates and times they can book, depending on the hours that you set for your business of for the staff offering the service.
And now they can click next, fill out their details, and then confirm the booking.
So I’ve successfully added online booking to my website.
In the next video I’ll should you how to set your Business hours and other business info, how to manage notifications and reminders for you, staff, and clients, and how to set your booking and cancellation policies.
Thanks for watching!
For Online Booking Part 2, follow this link.