
Love them or hate them, there’s no denying that a website pop-up is one of the most effective marketing techniques you can incorporate into your web design. A pop-up, which is a lightbox that appears over your content, drives more sales, encourages conversions and helps you capture leads or build email lists.
With the Website.com website builder, it is extremely simple to make a pop-up for your website.
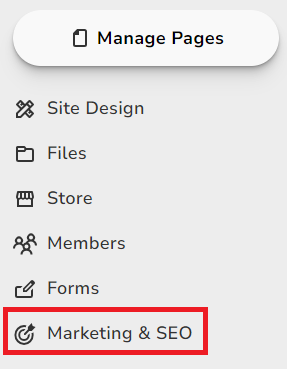
To add a pop-up, go to Marketing and SEO, and under Promotional Tools, click Pop-Up.

You’ll see a light box that explains what a lightbox is, and just click Make Pop-Up to create your pop-up.
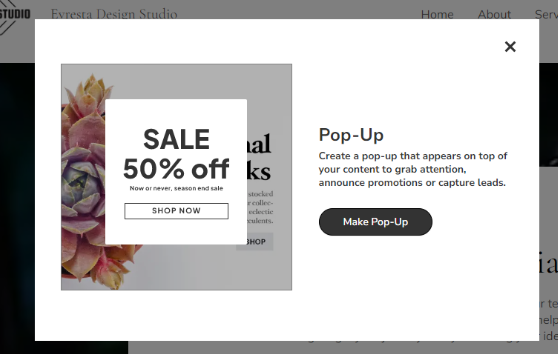
You can preview what the pop-up will look like on the right.
You can choose to set the pop-up appear automatically, and you can also create the pop-up first before adding links to your website that trigger your pop-up.
Display Settings
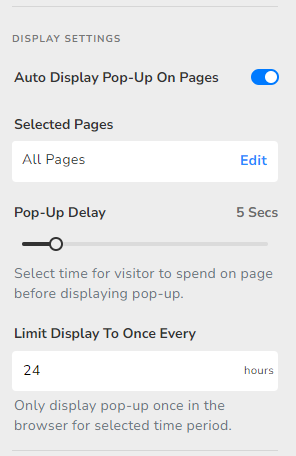
To have the pop-up appear automatically, turn that toggle on.
Next, choose which pages you want the pop-up to appear on. If you would like the pop-up to appear no matter which page the visitor first lands on, leave it at All Pages.
Now choose the Pop-Up Delay, which is the amount of time the visitor will need to spend on the page before the pop-up appears. It is a good idea to let visitors see your content and get oriented with your page content first, before having the pop-up appear. A delay between 5-30 seconds is usually recommended.
Automatic pop-ups are a great way to grab attention and inform visitors right away of something that may catch their interest. However, the last thing you want to do is annoy your visitors, or make the user experience so uncomfortable that they leave your page.
Limiting the automatic pop-up display to once for a certain time period is a good way to make the user experience less obnoxious for your visitors. You can enter your own custom time period based on your audience and your preferences, but limiting the pop-up to only auto display once every 24 hours within a visitor’s browser session is common.
After you’ve set up all the display settings, you can go ahead and edit the pop-up media and content.
Pop-Up Design
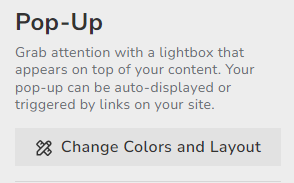
Before you customize the content, you can quickly look at other layout and styling options. Just click Change Colors and Layout, and then Click Change Design.
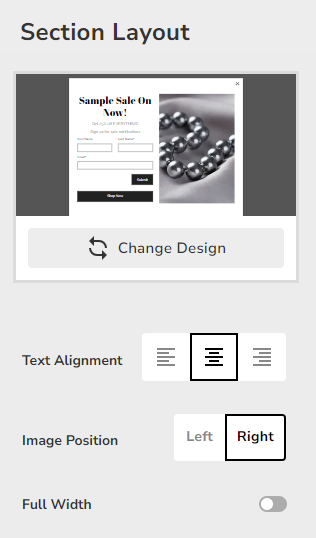
You can change the style of the overall pop-up, but if you want to stick with the default one, click Back.
If you want to keep the rest of the layout the same, click Back one more time.
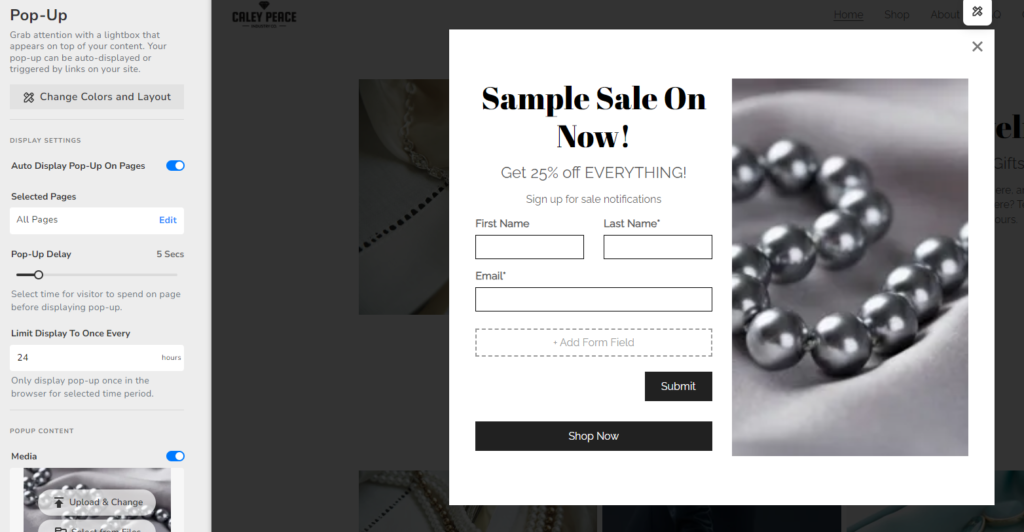
Pop-Up Content
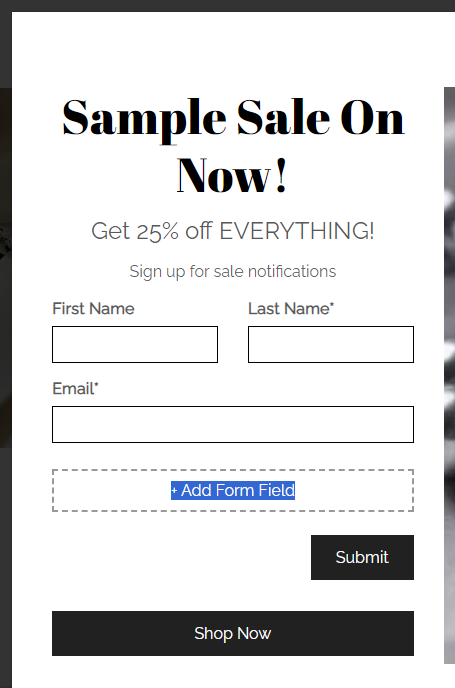
Pop-ups are a great way to announce a promo or sale, or take visitors to a featured event or product.
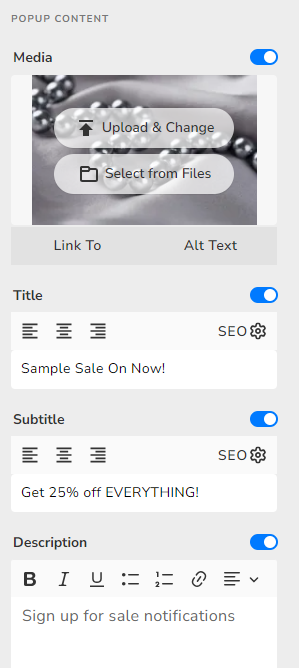
When you scroll down on the left, you can go ahead and edit the pop-up content.
You can customize the pop-up just like you can customize any page section on the Website.com website builder.
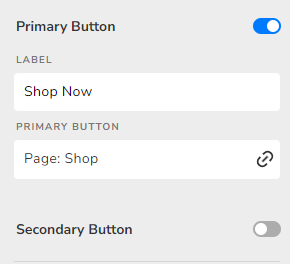
Just choose Upload & Change or Select from Files to change your pop-up image, and change the Title and Subtitle.
Feel free to add the necessary links for the buttons, or toggle them off if you don’t need them.
Pop-Up Contact Form
For Business Standard and Business Advanced plan users, you can add a contact form to your pop-up. This is a valuable tool which can allow you to capture leads for potential clients.
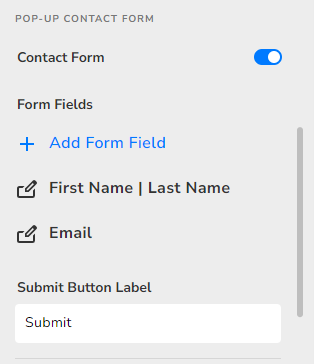
Just click on the toggle to add a form. You can customize the field that is there, and choose to see whether you want to make it required. Feel free to add more fields and customize them.
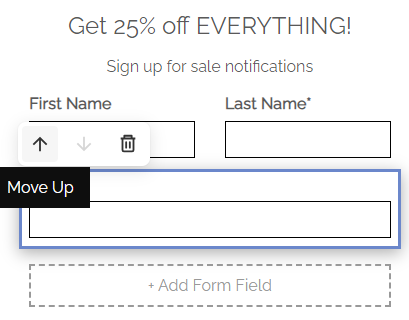
To rearrange the order of the form fields, just click on the field and then click the up or down arrow to rearrange.
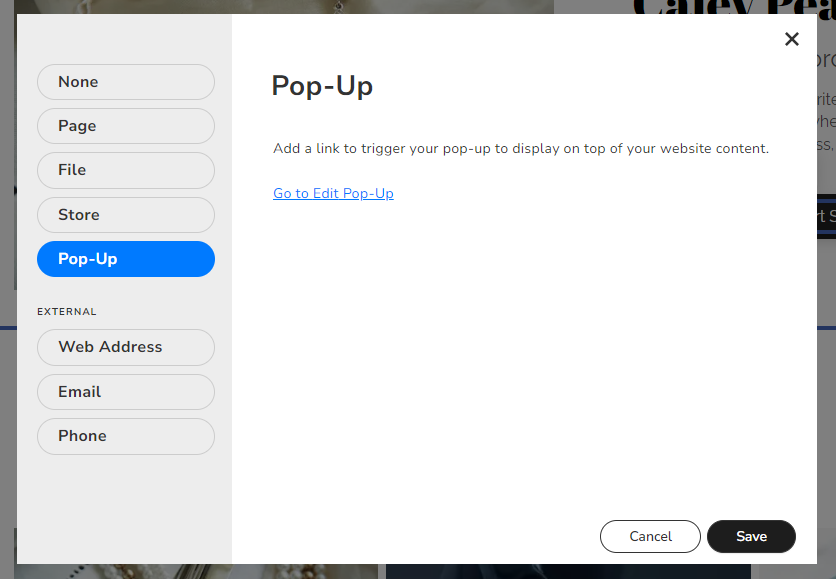
Add Pop-Up to Link
It’s easy to allow visitors to trigger the pop-up by clicking a button or link.
Go to the page you want to add the link to. Choose the button or highlight the text to link to the pop-up. Click on the Link icon.
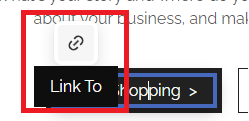
On the left, choose Pop-Up, and then click Save.
You’re done!
Now it’s your turn to add a pop-up to your website! Generate leads, get more sales and build your email lists.
Want to watch a video tutorial on adding a pop-up to your website? Here it is: