A one page website is a web design style where the entire website only has a single page. Instead of several web pages, it has multiple sections, so site visitors can scroll through the entire site, or use the menu items to flow to different sections on your website.
A one page website is a great choice for you if you have a clear goal you want users to achieve, if you don’t have too much content you need to include on your website, or if you want to create a sleek yet simple website design.
In this article, you’ll learn how to make an effective one page website using the Website.com site builder.
Choose a Template
First, choose your template. The template, “Landing Page” is a one page website design, but if you start with a template with multiple pages, you can just go ahead and remove all the pages except for one.
Add A Sticky Header
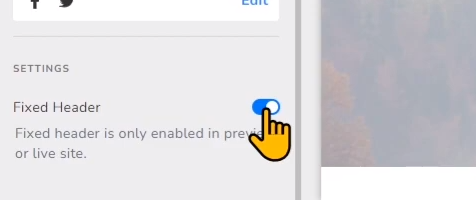
First of all, make sure the website header, which is the top section that contains the website menu, is a fixed header.
That means that even if visitors scroll down the page, the header and site menu will remain at the top.
Just click on the header. On the left, make sure it is toggled on.
Optimize Your Website Structure
Next, it’s time to think about your website structure.
Your main content should be above the fold, which is what visitors see in the browser before they’ve scrolled down the page.
Prioritize your content so that your most important content can be seen higher up on your website.
Organize Your Site Menu
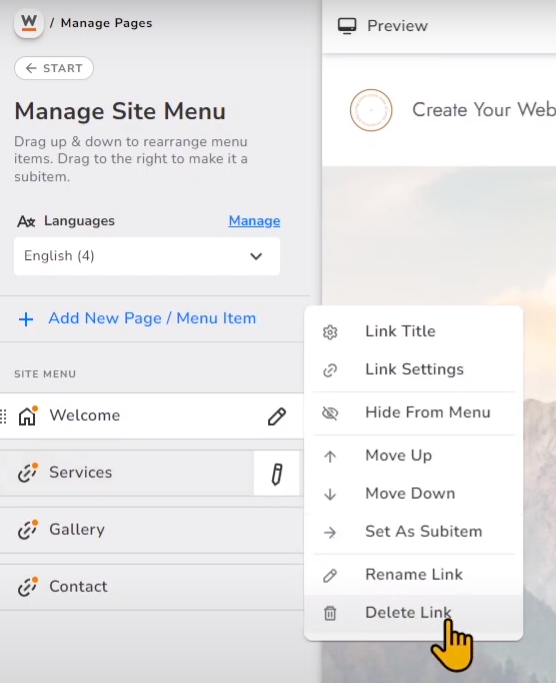
To remove any pages or links in your website menu, go to Manage Pages to see all the menu items (pages and links) that came with the template.
Remove any of the pages or sections that you don’t need. Just click the “Edit” pencil icon beside it, and click Delete Link or Delete Page.
Now to add a new menu link to your one page website, you’ll first need to create the content on your website before you add it to the menu.
Add New Page Sections
You can easily add new sections to your web page. You can later add an anchor link in the site menu which will jump to these sections.
For example, if you want to add an About section under the Welcome section of my website, just click on the Welcome section, and then click Add Section underneath it.
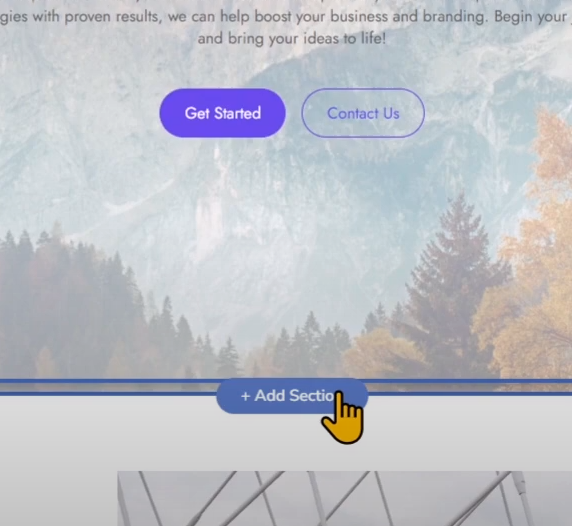
Now add an About section. Just choose the layout you like.
Add New Menu Links
When the section is created, go ahead and add a link to it in the site menu.
Just click back to Manage pages, and click Add New Menu Page/Menu Item.
Instead of adding a new page, because we’re making a one page website, add a new link: Section in Page.

So in Section in Page, choose to add a link that will lead to About Us.
Now click Add Link to Menu.
Now you can customize the Link Title, which is how it will appear in your site menu.
Voila! You’ve now added an anchor link that will lead visitors to your specified page section.
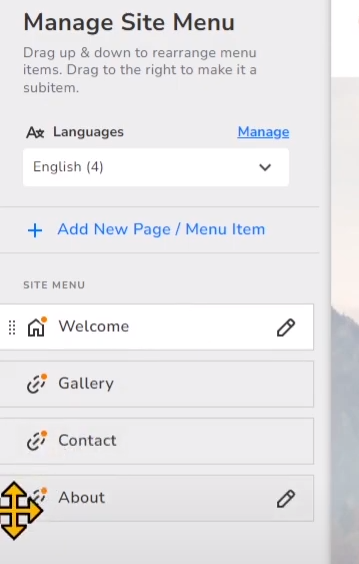
Rearrange Menu Link Order
If you want to rearrange the order of your menu links, in Manage Pages, you’ll see all the items that are in your site menu under Manage Site Menu.
Click and drag on the left of each site menu item to rearrange the order.
So now you already have your own one page website! Go to the preview to see what it will look like.
Notice that when visitors click on a menu item, your visitors will see a beautiful scrolling effect that will take them to that page section.
More Tips For An Effective One Page Website
Navigation Links In Footer
In the footer, it would be useful to add footer links to make navigation even easier.
Just click on the footer, and add Navigation links by clicking Edit on the left.
We have a video that walks you through how to add footer links to make your website navigation even easier for your clients.
Social Media Links
Including links to your social media profile is a great opportunity to connect all aspects of your online presence.
Just click on the icons in the footer and click the pencil icon, then add links to your social media profiles.
Customize and Publish Your One Page Website
Now after you’ve customized all of the text, images and content on your website, you can make it go live! Just click Publish in the top right corner.
Want to see the steps in action? Watch this video!